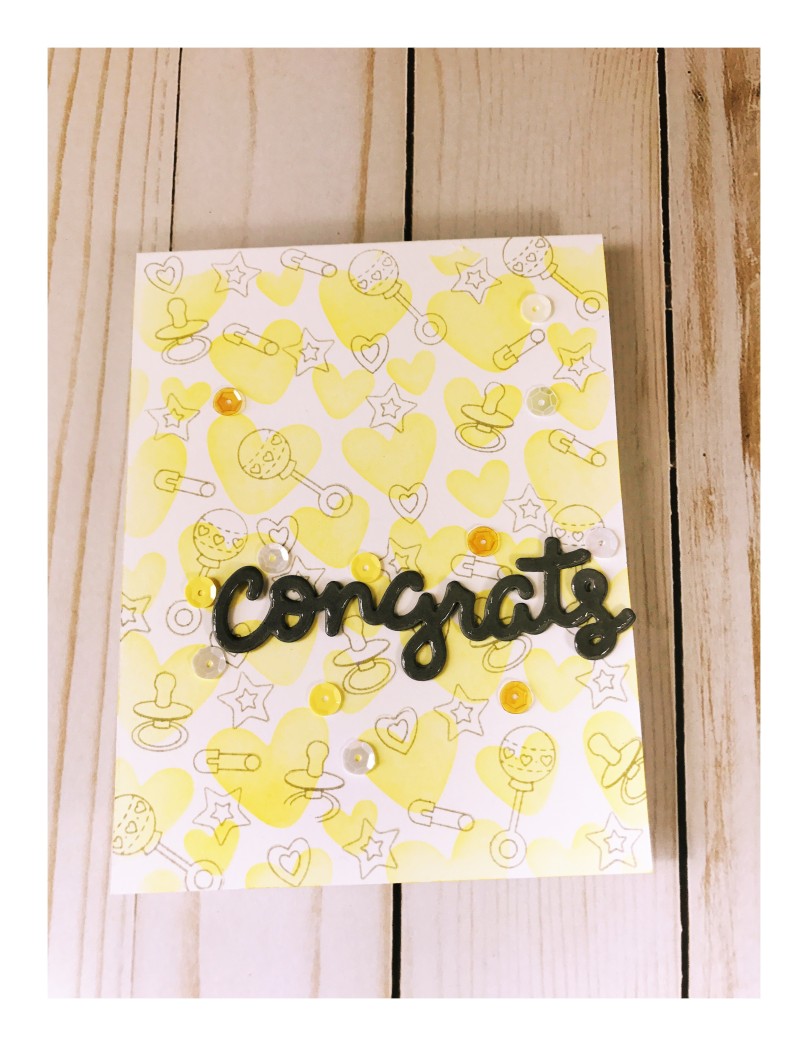
One of Matt’s cousins graduated this past spring from high school. She sent us an invitation/announcement months ago and guess what… I’m JUST NOW sending her a congratulatory card and present! YIKES! To be honest, her graduation announcement was buried underneath some junk mail on the counter and we’ve just started doing some Spring cleaning, ha.
I thought it would be appropriate to use Lawn Fawn’s Hang In There stamp set since it features an adorable sloth and well, we were terribly slow in responding. This card was a bit lengthier than my normal 30-45 minutes per card, but it was a lot of fun to make!
First I cut some Canson XL watercolor paper into the size of a regular A2-sized card. I taped it down with painter’s tape on my craft board since I knew I was going to do ink smooshing. I haven’t done ink smooshing before this because honestly… It’s challenging to give up control, even in cardmaking!
Ink smooshing is NOT a technique I claim to be great at or really know how it came about, but look it up on YouTube and you’ll see a lot of fabulous cards and crafters use this technique!
I found some acetate in my supplies to be able to use with Lawn Fawn inks. This technique works well with dye-based inks because once some water is added, the ink moves easily on your paper. I lightly dabbed my Lawn Fawn mini ink cubes across my acetate sheet (an acrylic stamping block or old stamp packaging would substitute well too!). Then, using my Tim Holtz distress sprayer, I lightly spritz some water on the acetate until the ink starts beading up. I take the acetate and lay it facedown on my panel. I gently lift and maneuver the acetate sheet to move the ink color around. Depending on how concentrated you want the color, you’ll need to experiment on how much water to use. I found if I really watered down the ink, it was light and faint. When I tried being stingy with my water, parts of my card front had the ink pad impression (aka harsh edged lines) when I put the acetate down with minimal water.
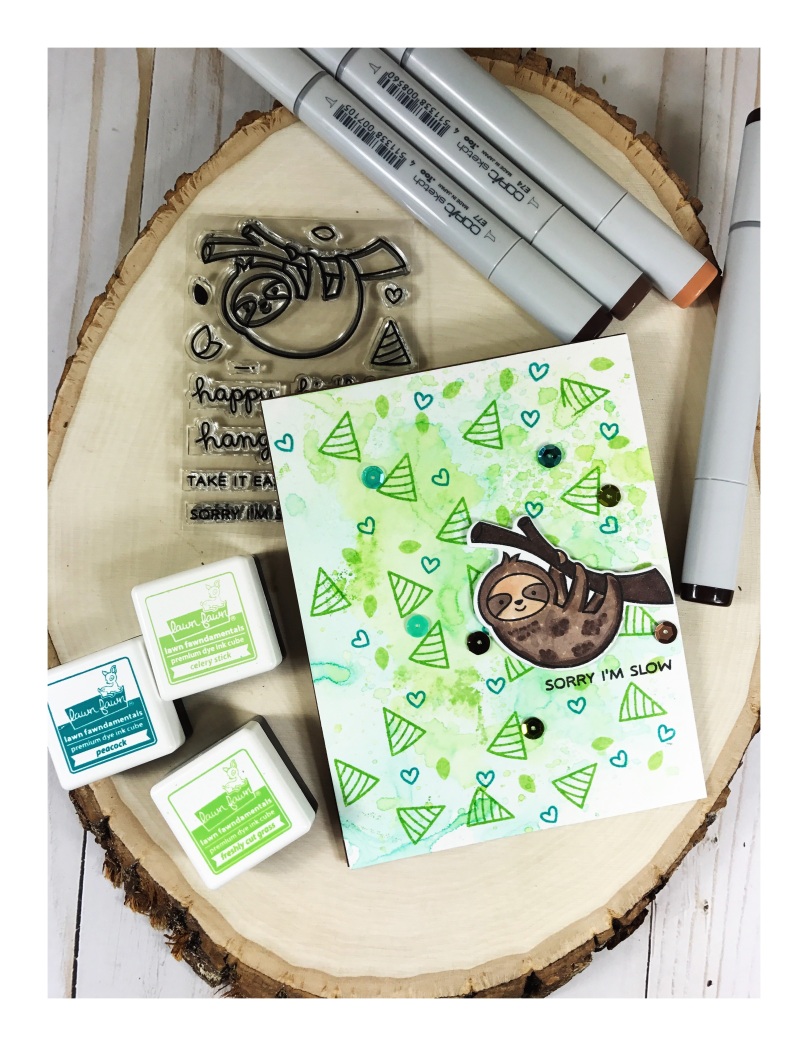
I did the ink smooshing background in layers. After I was satisfied with my first “layer”, I used my heat tool to dry it before doing repeated ink smooshing. For my inks, I used Lawn Fawn Freshly Cut Grass, Peacock, and Celery Stick. For the background, I used the party hat, leaf, and heart to randomly stamp the background.
Letting my card front dry, I used Recollections 110lb white cardstock and Lawn Fawn Jet Black ink (perfect for using with alcohol markers!) to stamp out the sloth. I used my Copic sketch markers in E74, E77, E79, and E13 to do very simple coloring. I ran my colored image through my die cutting machine. SIDE NOTE… using the Recollections heavyweight cardstock with low-tack tape resulted in me almost tearing my die cut so be very careful! This hasn’t happened with my Neenah cardstock, so I may want to reconsider what I’d use my Recollections cardstock for.
I wanted some dimension so I used 3M foam tape on this diecut. I used more of the Jet Black ink to stamp out the sentiment, Sorry I’m Slow. As a final embellishment, I used some Doodlebug assorted sequins. Finally, I adhered this cardfront to my base, using Recollections heavyweight brown cardstock from the Coffee and Cream pack.

I have to play with this Recollections more, but I’m thinking I may have to do a blog post about it on my thoughts and solicit feedback from you all.
Thanks for stopping by and until next time, happy crafting!